Monday, February 15, 2016

Belt Conversion - Front Sprocket


This blog post is the 3rd of 4 Belt Conversion posts. Here are links to the two previous posts:

Rear Cog Removal
Rear Cog Install

Replacing the front sprocket was suppose to be the easy part.  A simple plan to remove the four chainring bolts, swap the sprockets, and reinstall the bolts.  Yes, a simple plan, indeed.  I suspect every train wreck in the history of train wrecks started with a simple plan to go from point A to point B.  Here's how my train wreck sprocket replacement went:

There's no need to remove the crank or even the pedal, as the sprocket will slide right over them.  The original chainring came off as expected ... then the derailing happened.  The tabs on the Gates sprocket didn't line up with the cutouts on the Middleburn spider ... they were too long ... it wouldn't install.  I bolted the original sprocket to the gates sprocket to show the difference.


You might have to click on the image to expand it enough to see how the Gates sprocket extends farther at each of the bolt locations.  It seems this crap should be standardized, but its obviously not.  Not sure if it was Middleburn or Gates that screwed the pooch, but I'm definitely the pooch in this analogy.

I had already filed on my expensive Rohloff hub, and I have to admit the pucker factor was pretty high.  Now, I have to either file the Middleburn spider or the Gates sprocket about 1/16th of an inch at each contact point.  I ended up filing both ... starting with the spider but found the sprocket was easier to grip and get good strokes with the file.  I hope I didn't bend the sprocket in the process.

Its done, but removing metal from components that are supposed to fit isn't fun.

Belt Conversion - Rear Cog Install

This blog post is the 2rd of 4 Belt Conversion posts. Here is the link to part one:

Rear Cog Removal

The Rohloff-Gates carrier only goes on one logical way, with the threads for the sprocket pointing out.  A liberal mount of waterproof grease applied to the threads of both the hub and the carrier, and the carrier screwed on easily.  I did find it convenient to leave the cog removal tool (from when I removed the original cog) in place.  This helped guide carrier and avoid cross-threading.

The cog's positioning wasn't quite so simple, as it  would screw on either way without being obvious as to which way was right.  It also isn't symmetrical, as one side has a lip, so there is a right way.  Wanting to install it correctly, I broke down and actually read the instructions that came from Gates.  Imagine that.  It didn't help at all.  The entire instruction sheet talked about proper belt handling.

So, I guessed. The cog only screwed on about two threads and stopped..  It didn't seem right ... that and the fact any time there's a 50-50 shot at anything, I guess wrong 83% of the time.  So, I guessed again.  Bingo, the cog screwed on farther and came flush with the edge of the carrier.  Lip side out ... again with plenty of water proof grease on all the threads.

Here's a pic ... note: the carrier is black and the sprocket silver.


Belt Conversion - Rear Cog Removal

This is the first of four blog posts describing my belt conversion.

Getting the bleeping rear cog off.  Here's what I did ...

1.  Clean the hub of as much gunk as possible before starting.  I used dish soap, water and a rag ... but degreaser would have worked better.  A wooden toothpick works well for cleaning the slots where the prongs of the removal tool insert.

2.  Fasten the cog removal tool using a skewer.  Make sure the tool inserts all the way into the slots (see picture).  I chose to remove the skewer springs and attach it with the nut end of the skewer on the drive side.  Including the springs might have been a better choice, as the skewer didn't remove as easily as it should have.


3.  Attach the chain whip making sure as many links of the chain are engaged as possible.  I used a large crescent wrench on the removal tool.  At this point its all about leverage  Despite me muttering "design flaw" several times, If you get enough leverage on the wrench and chain whip, in opposite directions, the cog will loosen.  You won't believe it until it does, however.

Getting the necessary leverage ...

I had talked on the phone to a reader of this blog named Mark.  Mark employs a two man operation using a hammer to remove the rear cog from a Rohloff hub.  He didn't go into details, but I envisioned one person operating the wrench connected to the hub tool and another on the chain whip end.  Not sure which side he hammered but I assume the chain whip side.

My first attempt mimicked Mark's method.  With wife
bearing down on the crescent wrench, I wailed away on the chain whip handle with a large hammer.  I continued hitting about six times beyond when the wife started complaining ... sorry dear.  Fail number one.  I needed more leverage.

Attempt two:  I just happened to have a 16" long piece of 1 1/4" PVC pipe in the garage, and the crescent wrench handle just happened to barely fit inside the pipe.  I was a bit concerned about the strength of the pipe, but the garage didn't yield any other options, so I went with it.  Some sound advice:  Never clean the garage.

Now, with the wife leaning all her weight (she's 5'2" by the way) on the PVC and me countering that weight on the chain whip end, the cog loosened with a gentle bounce of weight on my end.  It seemed quite easy once we had enough leverage.


My LBS tried getting the cog off a few weeks ago.  In a previous post, I stated concern that the mechanic had actually tried to tighten the cog.  Fear confirmed.  The slots on the hub, where the removal tool inserts, were damaged in a way indicating a tightening action.   The slots were actually broadened so much that burrs prevented the cog from coming of freely.  The cog actually cut threads into the burrs as it came off.  The burrs had to be filed down before the Rohloff-Gates carrier would spin on.  More sound advice:  Don't let any mechanic work on a Rohloff unless they are experienced with the hub.

Thursday, February 4, 2016

Lefty Loosy, Righty Tighty

I plan to install the Gates Belt components onto my Wolverine this weekend.  I hadn't had many weekends free lately, but this looks as good as any.  Its important to note, I've been waiting for a full weekend in case issues arise.  This bike is my ride to work, so it has to be up and running Monday morning at 7:00 AM.  A week night might not allow me the time needed.

I did make two attempts on two different weekends, though.  Both attempts started with trying to get the cog off the hub.  I tried one Friday night using a make-shift chain whip but failed, so the next morning I took it to the ol' reliable local bike shop.  With my Rohloff cog removal tool (pictured) already affixed to the hub, one of the mechanics took it to the back of the shop to "give it a go".  Twenty minutes later he returned with cog still attached to the hub.  He had used a vice to hold the hub, then bent two tools trying to get the cog off.  Sigh.


On the second attempt, I took the wheel with me on an out of town trip, in hopes a bike shop there could help ... but forgot the tool.  I went to a shop that sells Rohloff related items (including the tool) on their website, so there was hope they would have some experience ... nope.  The first mechanic asked three times what kind of hub it was.  He'd never even heard of a Rohloff.  The second guy let me into his shop with him.  He attached the tool and a large chain whip ... my hopes ran high.  As he readied to press the chain whip and wrench down in opposite directions I noticed he had it backward ... ready to tighten the cog!  After a brief disagreement, I finally convinced him that the cog screwed on and needed to come off like a nut.  Then I notice he had attached the wrong tool.  Deep sigh.  Went home with the stubborn cog still attached.

I now wonder if the first mechanic didn't spend 20 minutes and two bent tools tightening the hell out of my cog.  Ugh.

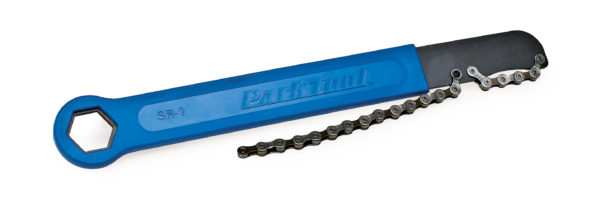
Bought a Park Tool SR-11 Chain whip ...  that cog comes off this weekend!


Friday, December 4, 2015

I Could Use A Good Belt

It's my birthday today and I'm considering taking my sister's advice by inviting Jack Daniels to my birthday party.  It will be a party of two, Jack and I.  After a few good belts of whiskey, I'll be seeking another good belt, of the Gates Carbon Drive variety.

The original plan for this bike was a Rohloff/belt drive contraption.  I picked the Wolverine frameset for several compelling reasons (steel, versatile, price, slick dropouts, etc.) but searching for belt capable frames that could also easily accommodate a Rohloff lead me to the Soma gem to start with.

Then reality struck ...

Nobody would sell me the carrier (pictured) necessary to install a Gates belt-compatible cog onto the Rohloff hub.  Rohloff only allows the sale of the carrier for frames that pass their stiffness test.  Apparently the Wolverine frame proved to flex too much to pass the test.   Please note, flex does not equate to cheap or weak.  Steel flexes than most other frame materials and is the reason many people ride steel.  Flex is good for ride quality but apparently poor for belt/Rohloff configurations.  Emails to Neil at CycleMonkey and Joe at JoeBike confirmed the test failures, and Ivan at BTI explained how the Rohloff's torque causes frame flex that can cause fluctuations in belt tension, inviting belts to slide off the sprocket.  The wolverine is belt capable and is Rohloff capable, but not Belt/Rohloff capable.  Reality stinks sometimes.


So why am I looking for a belt now when three experts said no?  It turns out JoeBike did some investigating and got some answers.  Here's what they posted on their website:

"Rohloff insisted that Gates test compatibility using the pre-CenterTrack system...and in that case the frame failed the stiffness test. We had to do a lot of research to find this out, talking to everybody from Soma to Gates to Spot to the US Rohloff distributor, and finally to Rohloff directly. This is what it all boils down to: it would likely pass with CenterTrack, but because Gates still sells pre-CenterTrack, Rohloff won't provide warranty coverage on any hub that's matched to a Gates system. For now."

I bolded the part that caused me to reconsider putting a belt on my Rohloff Wolverine.  The newer CDX belts resolved the issue of belts sliding off the sprocket, so the CDX belt/Rohloff/Wolverine would "likely" work, as suggested by JoeBike.  Besides, one of my favorite sayings is "a test is worth three expert opinions." 

Since I was able to source a Rohloff carrier (won't say from where), let's do a test!

Monday, August 24, 2015

Pics - FINALLY

Just realized I never posted pictures of the completed bike, so here are a few.


Thursday, August 20, 2015

1,000 Mile Update

I hit 1,000 miles on the ol' bike computer last week, so it seems a How's-It-Going update is in order.

In this post, back in April, I listed three objectives for this bike:  1) Durable  2) Reliable  3) Low Maintenance.  Let's see how that turned out so far ...

Durable:  A+ Okay, its only been a thousand miles.  I would hope the mean time between failure on any quality bike part should exceed that.  Good news, that's been the case for me so far.  No failures ... knocking on wood. 

Reliable:  A  I've had three flat tires already.  I say "already" because I had hoped the Marathon Supremes would stand up better against goat head thorns.  To be fair to Schwalbe, only two of flats were puncture wounds, and only one of those punctures was a direct hit by one of those pesky thorns.  The other thorn  somehow managed to jump up and stab itself into the sidewall.  Now they can jump?!?!  I never expected zero flats, so I can't complain, but also can't give a perfect A+ rating.

Low Maintenance:  A+  Two chain lubes and one scheduled hub oil change ... period.  No adjustments, no repairs, no anything so far.  Again, not many miles, but "no anything" has been really nice.  Well, I've had to air the tires a few times ... does that count?

Other stuff ...

The Vaude bags have proven to be exactly what I needed.  One serves as my gym bag.  My clothes, towel, etc., fill the bag but I've never lacked for space.  The other bag carries my lunch, lock and flat repair kit.  There's lots of room left over in case I have anything else to carry.  They are waterproof, which I've had to trust several times, so nothing has gotten wet ... still knocking on that wood.

I'm convinced when the earth gets close to the sun, millions of years from now, and exterminates all life on the planet, there will be nothing left but rocks and old Rohloffs.  A mechanical marvel ... a marvel, I say!

A scientist could measure the indentations on my Brooks saddle and confirm beyond reasonable doubt they were formed by my hind parts ... ya know, like analyzing shark bites.  It took more than 200 miles to break in, as some suggest, but it has come to fit like a customized glove.  I don't even think about that contact point any more.

The only complaint I have is the bike doesn't clean itself ... and ... pffft ... I'm not going to do it.  Maybe someone will invent a bike wash I can ride through at 20 mph.